
Efficient Chaos
Techniques I use for fast pseudo-randomness in pixel shaders

Sup, hope you are well!
Nature is mostly chaotic, while computers are deterministic. Ironically, a lot of time and resources are spent trying to generate (pseudo) randomness. This tutorial will explore some techniques I use in my shaders to add some natural randomness. This technique can be used for scattering stars, rain, leaves, particles, money, or objects.

If you’ve read my guide on fluid Turbulence, you may have some ideas about how this method works:
Turbulence

What do water, fire, dust, magic, wind, fog, smoke, and clouds have in common? They are all heavily influenced by turbulent dynamics.
Today, we are not going to be solving the Navier-Stokes equations (but I will include some resources at the end if you want to). Instead, we will fake it! Proper simulations require multiple shader passes, are slow, memory-intensive, and are limited by resolution. Most of the time, we can get away with cheaper real-time approximations and still create impressive effects. Let’s hop in!
This concept is similar, but with a few additional options for greater variety. Better yet, this works in 3D without additional costs. Classic Worley Noise, for instance, has a complexity cost of 3^N for N-dimensions (9 samples in 2D, 27 samples in 3D, 81 samples in 4D), making it less than ideal in 3D applications.
Grid Cells
We just start with a basic, tiled grid of points. Then we can add a few layers with offsets. 3 to 5 is pretty generally reasonable. Next, you can increase the spacing with each layer to break the tiling. And when combined with rotation, you eliminate most of the visible tiling:
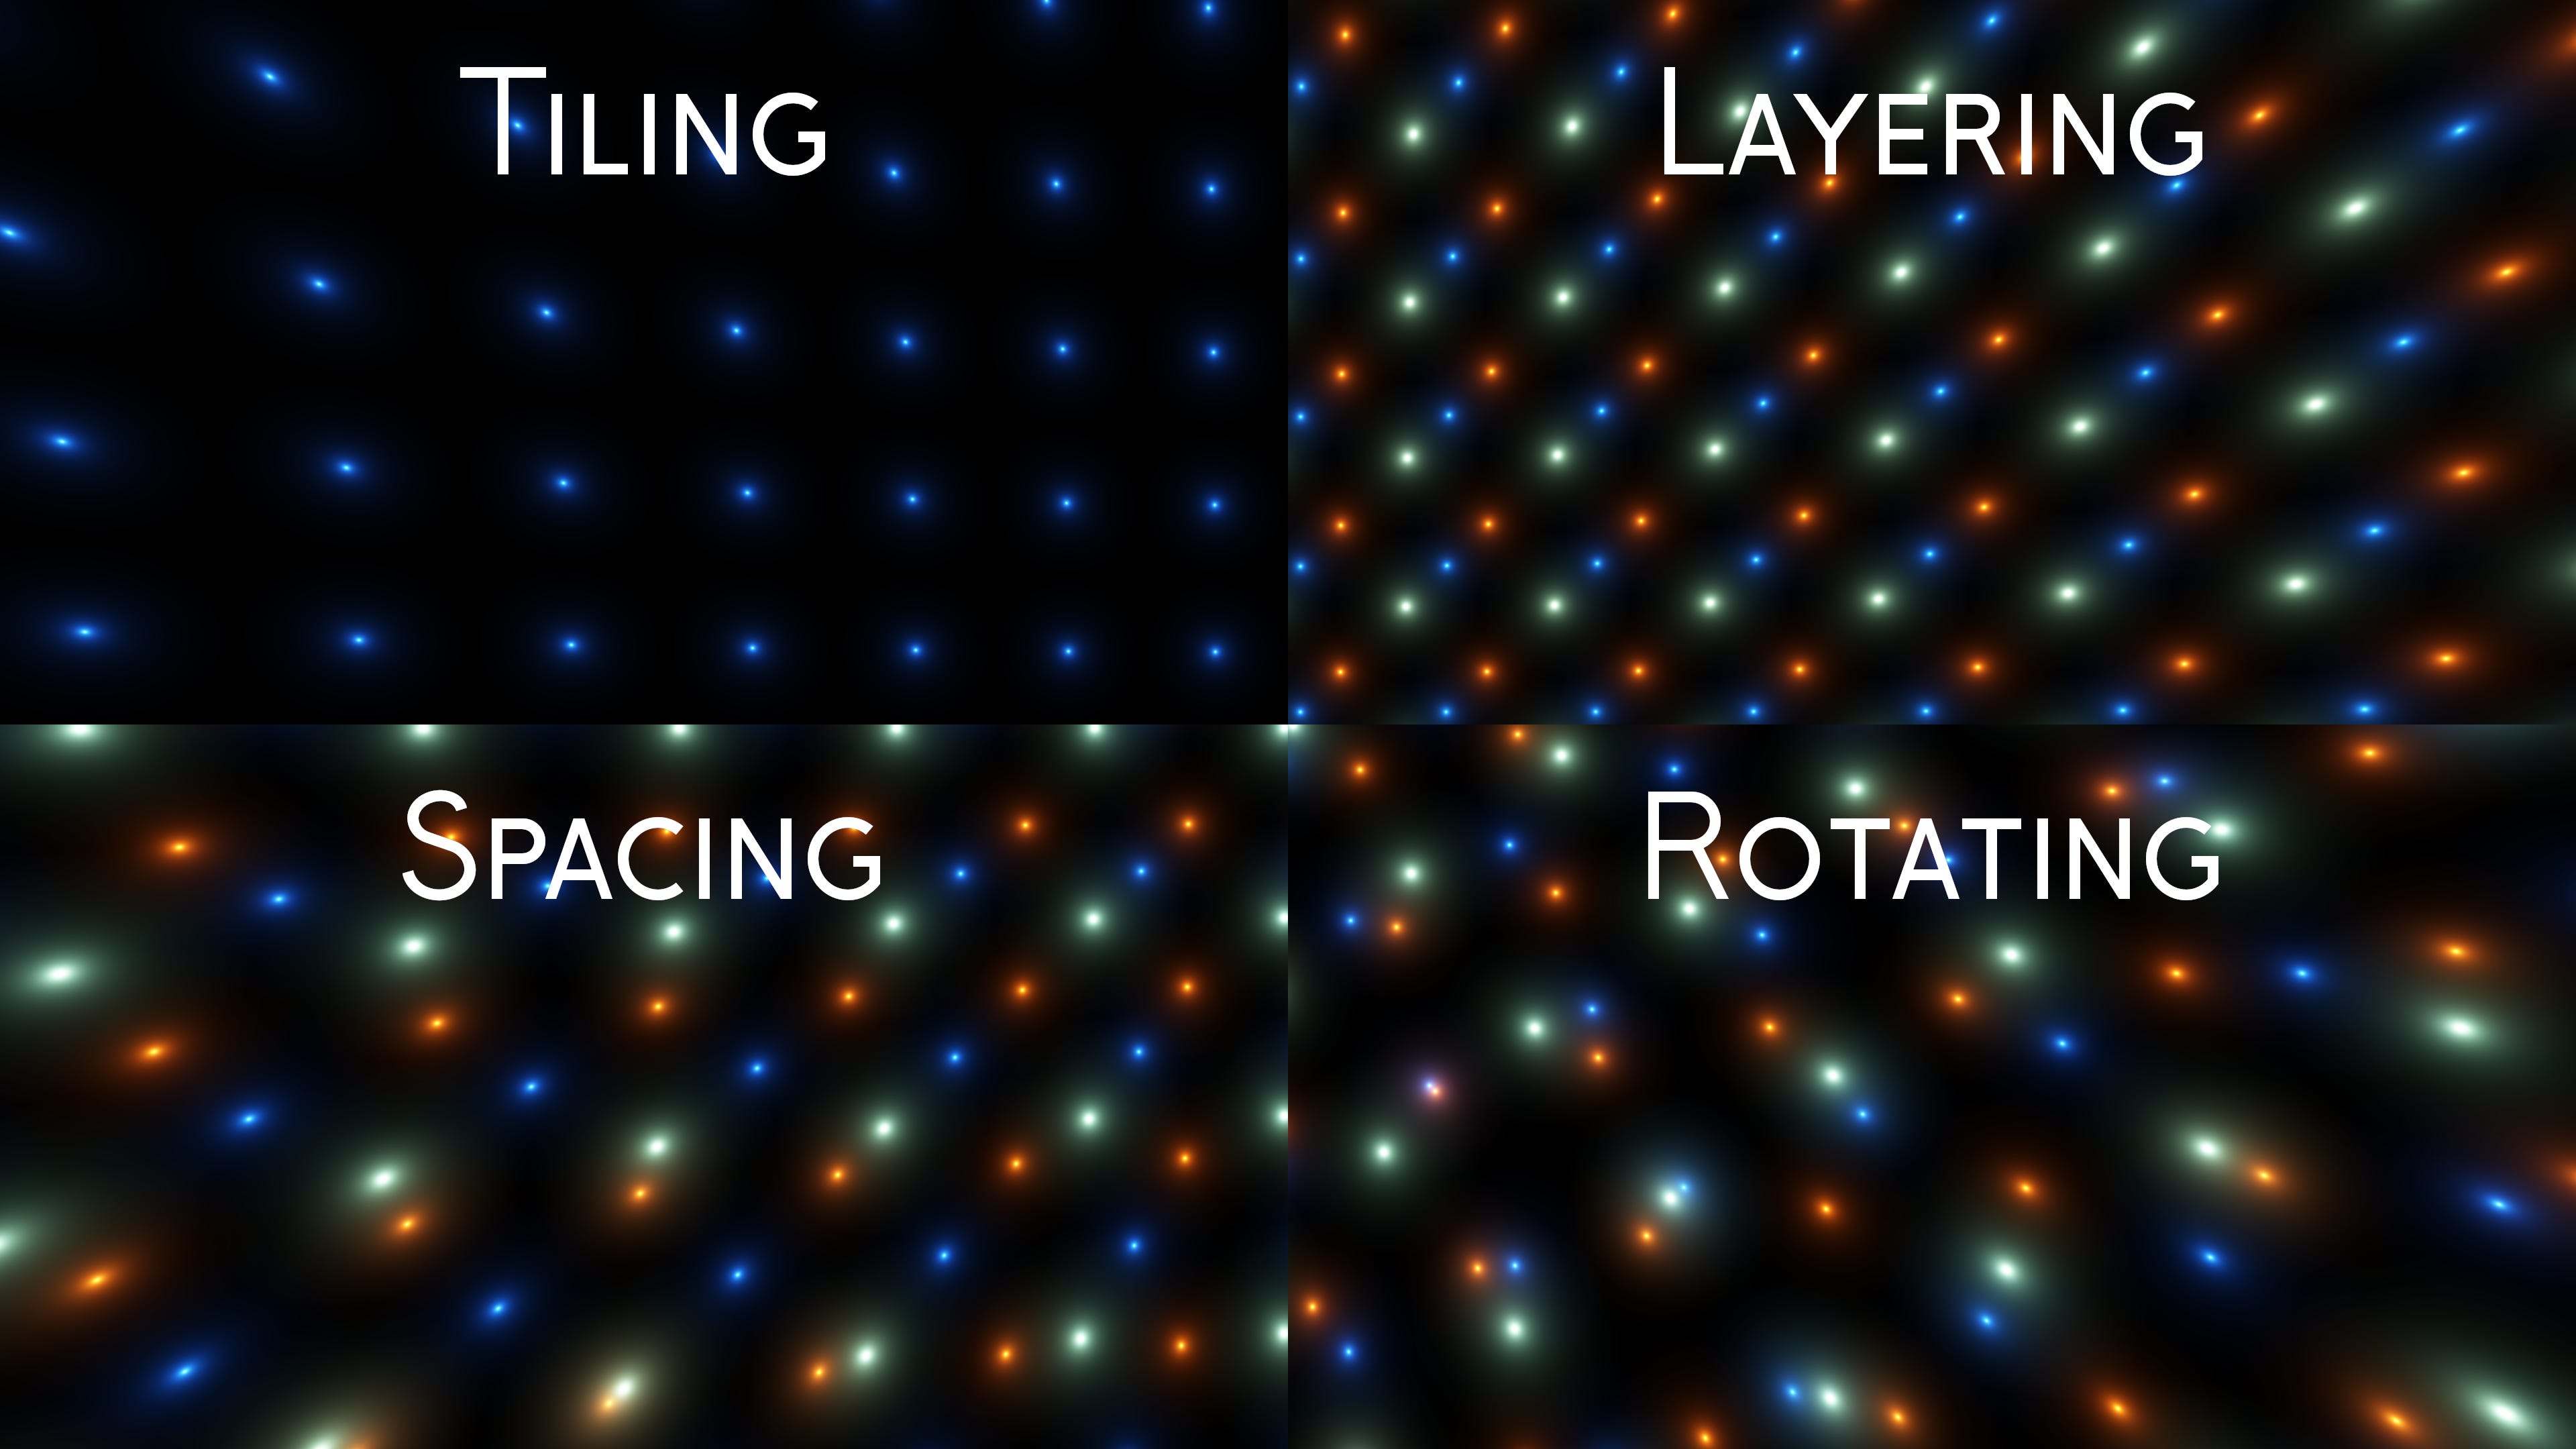
At a glance, the rotated image looks pretty random to me. The colored layers kind of give away the patterns, but that can be easily solved.
Here’s a grayscale output with just 5 layers:

First, you can split the coordinates into cells using fract() or mod() and find the difference to the cell center.
//Break the coordinates into cells of 2 units
vec2 subcell = mod(coord, 2.0) - 1.0;
For this example, we’ll use the distance to the cell centers for our star point lights:
//Distance to cell center
float len = length(subcell);
//Light attenuation with circle cutoff
float att = max(1.0-len, 0.0) / len;Note: You can use whatever function you want here. You could have randomly rotated squares, rain particles, snowflakes, or anything else that fits neatly in the cells. For extra variety, randomize the particle orientation, scale, and position within the cell (avoiding edge clipping)
To add layers with shifting, I have:
//Loop through the layers
for(float i = 0.0; i<LAYERS; i++)
{
    //Save the base coordinates
    vec2 p = coord;
    //Apply a layer shift for each layer
    p += LAYER_SHIFT*i;

    //...Use p for our sub-coordinates and sum lights
Next, we can simply scale each layer like so:
//Adjust layer scaling
p /= 1.0 + LAYER_SCALE*i;
And finally, for rotation, I could just rotate the base coordinates:
//Rotate layer
//Read about the Golden Angle here:
//https://mini.gmshaders.com/i/139108917/golden-angle
coord *= mat2(0.22252093, -0.97492791, 0.97492791,  0.22252093);
This works well for simple cases, but since we are rotating the base coordinates, we lose the original orientation. If you want to add some parallax motion or directional lighting, you still need the original orientation.
Another method is to save the orientation matrix separately so we can apply it when needed:
//Starting orientation (no rotation)
mat2 orient = mat2(1.0);


//Inside the for loop:
orient *= gold;
vec2 p = coord * orient;
This is the approach I will be using later for the parallax example.
Putting everything together, we’ll have the following:
//Number of layers
#define LAYERS 5.0
//Overall scale
#define SCALE 0.1
//Overall brightness
#define BRIGHTNESS 0.04

//Toggle layer shift (shifting factor)
#define LAYER_SHIFT 2.618
//Toggle layer spacing (spacing factor)
#define LAYER_SCALE 0.6


//Output color for example
vec3 col = vec3(0.0);

//Starfield Coordinates
vec2 c = fragCoord / iResolution.y / SCALE;

//Loop through layers
for(float i = 0.5 / LAYERS; i<1.0; i+=1.0 / LAYERS)
{
    //Rotate layer
    //Read about the Golden Angle here:
    //https://mini.gmshaders.com/i/139108917/golden-angle
    c *= mat2(0.22252093, -0.97492791, 0.97492791,  0.22252093);

    //Get rotated coordinates
    vec2 p = c;

    //Apply layer shifting
    p += LAYER_SHIFT*i;

    //Adjust layer scaling
    p /= 1.0 + LAYER_SCALE*i;

    //Distance to cell center
    float len = length(mod(p, 2.0) - 1.0);
    //Light attenuation with circle cutoff
    float att = max(1.0-len,0.0) / len;
    col += att;
}
The same concept works in 3D, too, without extra steps! Here’s my full ShaderToy demo with some extra features
Breaking Patterns
Most of the patterns are not too obvious, but if you have an expensive shader and could only afford a couple of layers, you may have visible axis lines:

My quick and easy fix is to add some waves for warping
//Warp the x and y axes with sine waves
p += LAYER_WAVES*sin(p.yx);
Playing with the wave amplitude so you can see what it looks like on 1 and 2 layers:
A wave amplitude of 1.0 is too much, but 0.2 seems to be a good balance between too much distortion and too much tiling. With just 2 layers, you really have to look for the patterns to find them!
There’s one other situational problem. If you zoom out, you’ll notice patterns, even with 5 layers. We could theoretically fix this by not zooming out or by adding more layers, but those are lazy solutions.
My preferred method is to cut random holes in the layers:
