
Mini: Derivatives
What is dFdx? Let's investigate shader derivatives

Hi world,
Today I want to unpack “derivatives”. What are they for and how do they work?
You may have come across intimidating math like this:

Don’t worry if you aren’t mathematically minded, we can break this down in a way that should be easier to understand.
Previously we need to enable the extension GL_OES_standard_derivatives, but GameMaker now enables it by default on platforms that support it. Let’s dig in!
Introduction
The concept of derivatives is at its core, a measure of change (like how slope measures change in y relative to x). The function dFdx(val) measures the change of “val” along the x-axis and dFdy() does the same for the y-axis.
To see how this works exactly, take a look at my illustration:

We know that fragment shaders are incredibly fast because they can process millions of pixels simultaneously. You might not know that pixels are actually processed in little 2x2 chunks at a time.
So suppose the shader is processing pixel “A” in the diagram above. You can actually read the differences in some value between pixel A and pixel B.
This is what dFdx does! You’re calculating the value for “v” at pixel A and pixel B simultaneously and returning the difference: dFdx(val) = val_B - val_A;
This is pretty neat because it’s a way to extract information from a neighbor pixel (even though they are processed simultaneously).
As you can probably guess: dFdy(val) = val_C - val_A;
This is far cheaper than computing the value twice for the two pixels and getting the difference yourself and it allows you to compute derivatives for varying variables (like vertex position or texture coordinates)!
The one drawback here is that these derivatives are computed in 2x2 chunks, so every pixel in the chunk will return the same derivative, but for linear functions, it makes no difference.
Now I wanna show you how they can actually be used!
Emboss
The simplest example I can think of is a quick emboss shader:
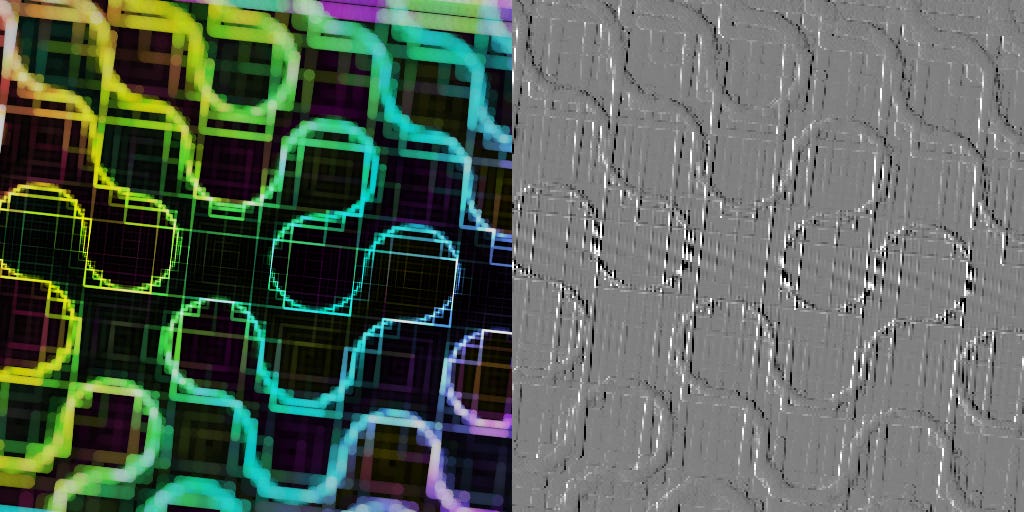
All we need is to convert the color image to a grayscale value and use the derivative of that for the output:
//Sample base texture
vec4 tex = v_color * texture2D(gm_BaseTexture, v_coord);

//Compute grayscale value
float gray = dot(tex, vec4(0.299, 0.587, 0.114, 0.0));

//Simple emboss using x-derivative
vec3 emboss = vec3(dFdx(gray) + 0.5);
//Output resulting color
gl_FragColor = vec4(emboss, tex.a);
You may have noticed some blockiness in the embossed image above. This is because of the 2x2 chunks and it’s a trade-off for extra performance. With a simple shader like this, it’s totally not necessary, but for example, if you did an expensive blur first, this is way better than blurring twice for the emboss effect.
Anti-aliasing
This can also be used for computing the texel scale at each pixel.
Here’s an anti-aliased circle despite being distorted:
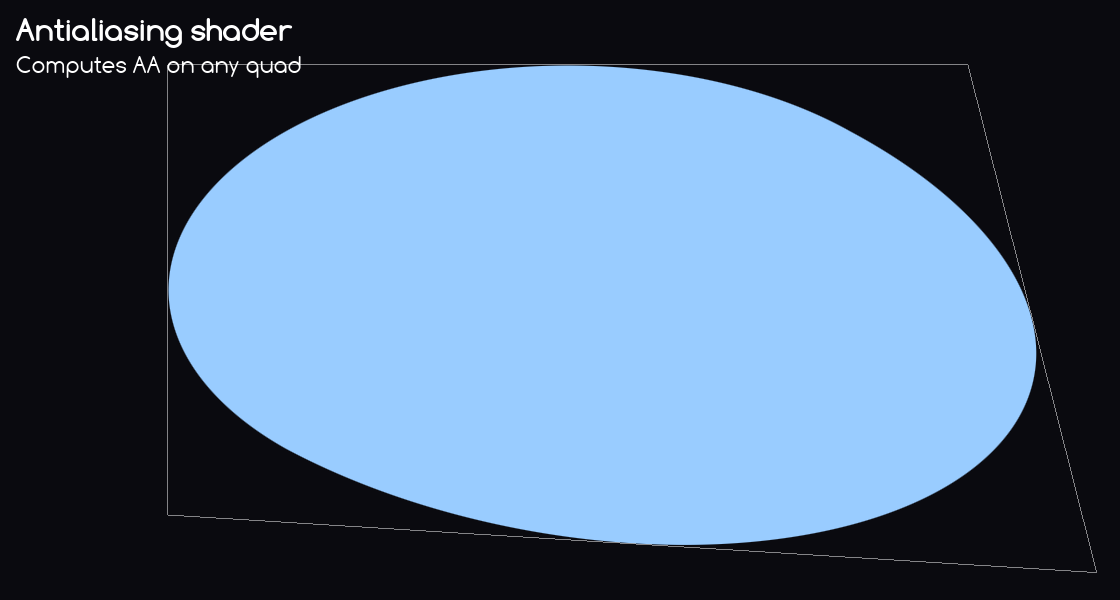
Here’s the code I used here!
//Distance to center of texture coordinates.
float dist = 0.5 - length(v_coord - 0.5);

//Use the derivative to find the texel width
float width = fwidth(dist);
//Better alternative: https://www.shadertoy.com/view/7dfGR4

//Divide the distance by texel width (to bring back to pixel range)
dist /= width;
gl_FragColor = vec4(0.6,0.8,1.0, clamp(dist+0.5, 0.0, 1.0));
fwidth is the third derivative function combined like so:fwidth(v) = abs(dFdx(v)) + abs(dFdy(v));
This finds the combined rate of change across the x and y axes.
Normals
One of the big challenges with normal mapping is maintaining orientation with rotations, stretching, skewing, and any other transformations. Derivatives allow you to account for every orientation with relative ease!

You can actually compute the orientation of the texture coordinates by using dFdx and dFdy!
//Sample normalmap
vec3 normalRGB = texture2D(normalmap, v_coord).rgb;
//Normalize and sign the vector
vec3 normal = normalize(normalRGB - 0.5);

//Compute the texture coordinates derivatives.
vec2 dx = dFdx(v_coord);
vec2 dy = dFdy(v_coord);

//Combine derivatives.
vec4 rot = vec4(dx, dy);
//Correct normal with texture orientation (flipped for GM).
normal.xy *= mat2(normalize(rot.xz), -normalize(rot.yw));
You can download the full source code here.
And finally, perhaps the coolest trick is you can compute 3D face normals from a varying 3D position vector!
//The cross product of the xy plane is the face normal!
vec3 face_normal = normalize(cross(dFdx(p), dFdy(p)));
This could have a whole tutorial by itself, so I’ll leave the explanation for another day.
Coarse Versus Fine
One quick detail to note: there are actually two types of derivatives, coarse and fine.
Coarse derivatives are more widely supported (all that ShaderToy or GM currently support), so that’s what I illustrated above with the ABC pixels. GLSL 4.50 also supports Fine and Coarse variants of the functions like dFdxFine(), fwidthFine(), dFdxCoarse() and so on.
Fine derivatives are calculated in the same way, with 2x2 chunks, but they calculate the derivatives for each row and column separately.
So on the top row we still calculate dFdx the same:
dFdxFine(val) = val_B - val_A;
But the bottom row is calculated separately (D being the 4th pixel):
dFdxFine(val) = val_D - val_C;
dFdx, dFdy and fwidth can either return coarse derivatives or fine derivatives depending on what is supported. If you specifically one type or the other, you can specify that by using the other functions (if they are supported)
Conclusion
In summary, derivatives can give you extra context about the pixel you’re processing. This can be used to make cheap edge detection effects, soften edges at any scale, correct texture orientations, and even compute normals!
Derivatives are used internally for mipmapping, so it’s a great idea to get comfortable playing around with them. You won’t use them every day, but it’s yet another powerful tool for your tool belt.
That’s all for today. Thanks for reading and have a great weekend!
-Xor