Mini: Lights
The basics of light blending and attenuation
Hey folks,
Today, we will cover the very basics of lighting shaders. This will serve as the first stepping stone towards more complex lighting systems (normal mapping, PBR, shadows,) so if any of that interests you, you’re in the right place!
First, I want to address some shaderless methods, so let’s dive in!
Shaderless Lighting
I’ve often seen people use a surface filled with an ambient light color, like black, and lights are radial gradients subtracted from the ambient color (bm_subtract). This is fine for fog-of-war, but I don’t like it for lighting. It makes color lights more difficult and doesn’t behave like real lighting.
Instead, for a simple shaderless solution, I’d suggest creating a lighting surface. You can clear this with your ambient light color and draw your lights with an additive blend mode. The,n in the Draw GUI event, you can multiply this light surface with the application surface using blend modes:
//Draw game without lighting
draw_surface(application_surface,0,0);

//Multiply by lighting colors
gpu_set_blendmode_ext(bm_dest_color,bm_zero);
draw_surface(surf_light,0,0);
gpu_set_blendmode(bm_normal);
This allows you to easily create colored lights with ambient lighting in a more physically accurate way. The only limitation here you can’t get light levels brighter than 1.0, but that’s where shaders come in handy! Now on to shader lighting.
Falloff
Every lighting system needs a good falloff to simulate attenuation.
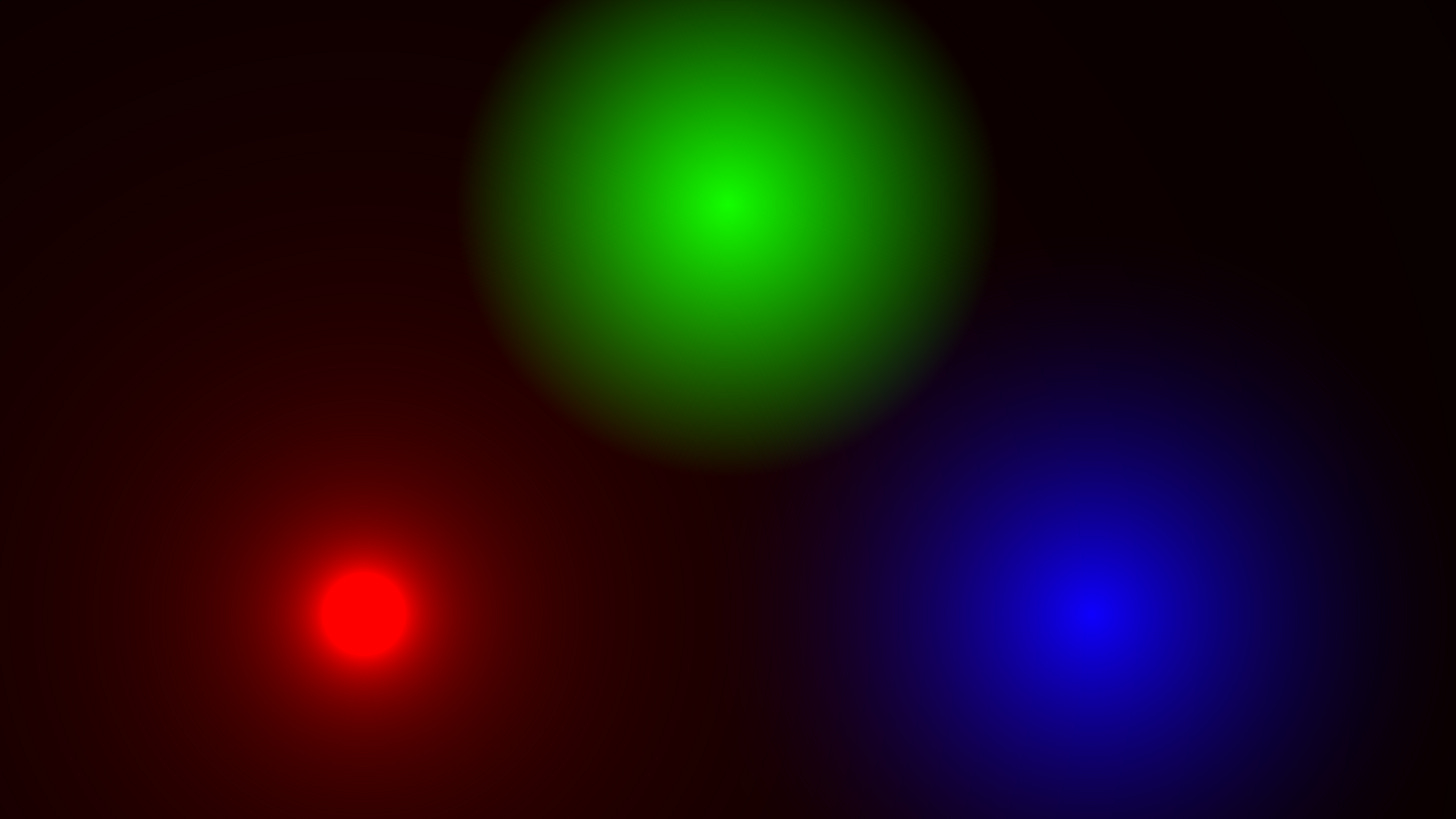
Here we have three common falloff equations:
//Red inverse light (0.05 is the intensity)
float light_r = 0.05 / dist1;
//Or alternatively: 0.05 / (0.05+dist1);

//Green linear light (3.0 is the inverse of the radius)
float light_g = max(1.0 - dist2*3.0, 0.0);

//Blue squared light (2.0 is the inverse of the radius)
float light_b = pow(max(1.0 - dist3*2.0, 0.0), 2.0);

//Output to test the lights
gl_FragColor = vec4(light_r, light_g, light_b, 1.0);
All we need is the distance from the pixel to the light (dist1..3) to calculate the lightness level. You might be wondering which is the most physically accurate. Mathematically, in a 3D world, light attenuates with the inverse of the distance squared (so 1/d/d). This makes sense if you think about it. The surface area of a sphere expands with the square of the radius (4πr2). Note: Don’t forget to apply gamma correction! With a standard gamma of 2.2, 1/d is a good approximation (from pow(d,-2.0/GAMMA))!
So, what falloff function should you use in a 2D game? Generally, I’d advise the squared light (please don’t use linear, it’s ugly), but ultimately I think the choice is a matter of personal taste. 2D is already a compromise in terms of physical accuracy, so why not just pick the one that looks best to you? Some falloff equations can also double as bloom or light in a fog!
Fun fact: these falloff functions also work well with Signed Distance Fields for area lights (but avoid convex shapes)!
Multiple Lights
So what about multiple lights? There are two main methods to consider:
Forward Rendering: This is when you loop through an array of lights in the fragment shader, adding the lights together before blending with the scene. This is simpler to set up and more precise with blending, but you’re limited by GPU bandwidth. If you’re using a uniform array for light positions, radii and color, you probably want to cap the lights to around 32.
Deferred Rendering: This is where you draw only one light at a time and combine it onto the surface. Once you’ve looped through all the lights, you then blend the resulting surface with the scene. This allows you to draw as many lights as your hardware will allow (not limited by bandwidth). You can draw even more if you draw the lights to light-radius circles instead of the full screen; it helps with performance. If you do, you can’t use the inverse falloff, the light never reaches zero, so every light contributes some to every pixel on the screen. This is very similar to the shaderless solution I suggested earlier, but now, with shaders, you can multiply the light by the scene color with each light pass to get around the maximum light level problem!
Both methods have their strengths and drawbacks. My general rule is, if I need more than 32 lights simultaneously, I use deferred rendering. If I can use less, I’ll use forward rendering.
One of the issues with deferred rendering is that it’s limited by GM’s 8-bit surfaces. This means that each result of each individual light is rounded to the nearest 1/255th. So if you had 5 lights with a light level of 0.2/255, the output should be 1/255, but the result is 0 because each step was rounded. This may sound like a very small error, but with enough lights, these errors can compound and be visible.
You could do a hybrid of forward and deferred rendering by processing lights in small groups, but I’ll leave that as an exercise for the brave among you!
Conclusion
The most important less here is do not use a subtract blend mode for lighting! Use additive (or bm_max) combine lights, and a multiply blend mode for applying the lighting onto diffuse objects!
Also, try playing around with different falloff functions to see what lighting looks right for you! You can sometimes produce beautiful bloom-like results without needing an expensive bloom pass if you do it right.
If you want to support my work, I always appreciate tips.
Thanks for reading! Have a great weekend.


Thank you!
I tried to duplicate the above Falloff lighting in Shadertoy. I created a sphere method that returns a float distance and then created 3 spheres and each one used the corresponding falloff calculations. The green and blue ones look similar to yours, but the red is very different. My red one has a mostly black center, and the red density increases until the edge of the sphere. There is no falloff past the edge of the sphere. This is not a big deal, but I am just curious of the difference. Thanks.