Guest: GI
Exploring 2D Global Illumination with @yaazarai
Hi! I’m Yaazarai from the GMC, I’ve been doing tutorials on the GameMaker Community for an eternity now, anywhere from Networking with GM/C# to Global Illumination. Formerly known as FatalSleep, 2D Lighting is my jam.
In this shader tutorial we’ll be going over GI or Global Illumination; more specifically using Radiosity based GI, a lighting technique to achieve real-time per-pixel 2D lighting for video games. Picking up this shader will teach you not only how to create fancy lighting, but about the basics of image-based distance fields and raymarching to accelerate scene rendering as well! Only the shaders are covered here, but in reality GI is 99% code setup and 1% shader shenanigans—source code linked at the end.
Jumpflood & Raymarching
The subject of raymarching is interesting since it allows you to accelerate rendering by approximating the distance from some arbitrary point in space to the nearest surface. The nearest surface could be some geometric shape (approximated by a distance function) or this magical thing: image-based distance fields.
Image-Based Distance Fields are generated using the Jump Flood Algorithm (JFA). For JFA to work you need to take your scene (walls for example) as an image and for every non-empty pixel store the coordinate of that pixel in the pixel itself. Then the JFA algorithm does something amazing, it offsets the image at set intervals so that other pixels can sample the nearest 3x3 encoded scene pixel positions and store the closest position. Then take the distance from the current pixel to the closest position to get the distance field from every pixel to surfaces in the image. Here’s a fantastic GMS2 asset for visualizing JFAs and Distance fields by Tero Hannula:

Now, raymarching is just taking some position XY, checking the distance field and jumping across the scene in the desired direction at the distance sampled, repeat until the distance sampled is near zero—i.e. we’ve hit a wall.

Global Illumination
Here is the raymarch function. The shader assumes you’re using GI as a world-space shader with square surfaces as distance fields get skewed when using rectangular non-squared surfaces, which need to be corrected (optional, see comments)
vec3 raymarch(vec2 pix, vec2 dir) {
    for(float dist = 0.0, i = 0.0; i < stepsPerRay; i += 1.0) {
        dist = texture2D(in_DistanceField, pix).r;
        pix += dir * dist;
            //optional correction, landscape: pix.x /= screen.y/screen.x
            //optional correction, portrait: pix.y /= screen.x/screen.y

	    if (dist < EPSILON)
	        return max(
                texture2D(gm_BaseTexture, pix).rgb,
                texture2D(gm_BaseTexture, pix - (dir * (1.0/screen))).rgb
	        );
	}
    return vec3(0.0);
}
// screen = world or screen XY resolution.
// pix = starting pixel coordinate.
// dir = delta angle--direction of ray.
Since rays are infinite we have to define how many times the ray will check the image’s distance field before it fails, known as “steps per ray.” This is to optimize for performance, infinity is bad. The optimal case seems to be 32-64 steps, adjust as needed. This function as we learned will loop for N steps per ray and move the ray along the distance field in the desired direction until the distance field gives us zero, showing that we’ve hit a wall or light surface. If we have a hit, return the color of the surface at the end of our ray AND the color just outside the surface in empty space (we’ll come back to this: Implicit Raybouncing). If the ray fails to find a surface, return black (empty space). This final hit color will then be returned to the pixel. Onto lighting…
Global Illumination itself is actually a pretty simple concept: You cast some N rays per pixel equally spaced in all directions and raymarch until you hit a surface, then you take the color of the surface (color = light, black = walls, no light) and add up the result of all the rays:
float dist = texture2D(in_DistanceField, in_FragCoord).r;
vec3 light = texture2D(gm_BaseTexture, in_FragCoord).rgb;

if (dist >= EPSILON) {
	float brightness = max(light.r, max(light.g, light.b)),
		noise = TAU * texture2D(in_BlueNoise, in_FragCoord).r;
	for(float ray = 0.0; ray < TAU; ray += TAU / in_RaysPerPixel) {
	    vec2 ray_angle = vec2(cos(noise + ray), -sin(noise + ray));
	    vec3 hit_color = raymarch(in_FragCoord, ray_angle);
		light += hit_color;
	    brightness += max(hit_color.r, max(hit_color.g, hit_color.b));
	}

	light = (light / brightness) * (brightness / in_RaysPerPixel);
}

gl_FragColor = vec4(light, 1.0);
This is the main() function of the GI shader. Lines 1-3 check the distance field to make sure the surface distance is greater than zero (not in a wall) or you early out (no need to raymarch inside walls). Lines 4 & 5 we define our brightness accumulator variable and we get our noise image sample and convert it to an angle in radians (we’ll come back to this: Noise & Hacks). Lines 7-12 we loop through N rays per pixel equally offsetting each ray (360 degrees or PI2 divided by the number of rays = arcdist between rays). Then we raymarch from the current pixel at the desired ray angle and check the surface hit color. Finally, on line 14 we calculate the final normalized light color multiplied by the magnitude of the accumulated rays to maintain constant brightness. This is the result, not very exciting, because our raymarcher doesn’t perform implicit ray bouncing to fill the scene:
Implicit Ray Bouncing
Okay, let’s revisit that raymarch function as promised! The raymarch function actually adds up and returns two surface colors, the color of the actual image surface, but also stepping back 1 pixel into empty space and returning the color of empty space as well!
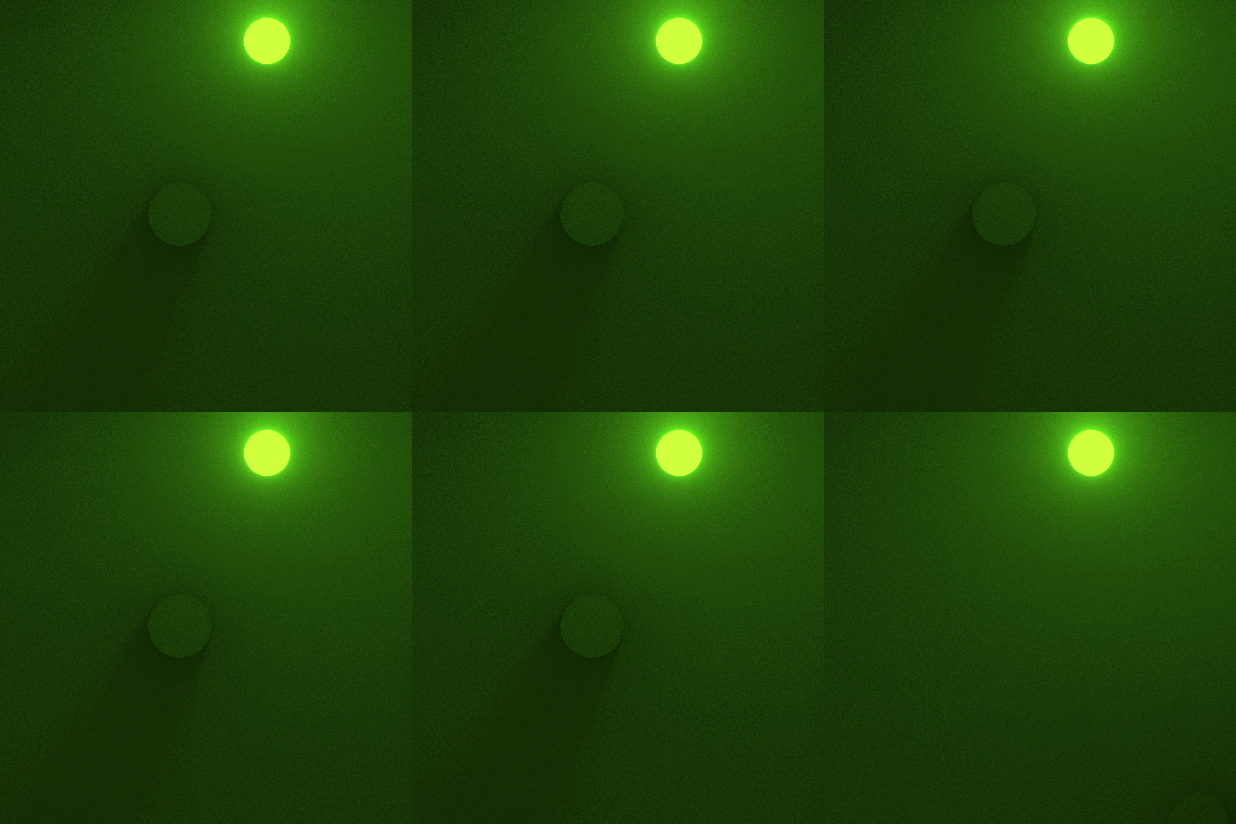
With GI we calculate the lighting every frame of our game, but we also pass the previous frame back into the GI shader as well to seed our lighting for implicit raybouncing. This works because when the next frame is calculated it has light from the previous frame in the empty illuminated space. This allows pixels not directly exposed to lights, occluded/shadowed by walls to sample light from directly exposed pixels as their light source! You can see how this works frame-by-frame, the initial pass lights up the room directly, then subsequent passes use the lit-up pixels-near walls from the previous frame to “bounce,” the light. You can move through this video frame-by-frame to see it in action.
Noise & Hacks
Last section to revisit: noise. There’s noise and then there’s noise that actually cares about your lighting. With GI we have to apply random offsets to the rays each pixel casts out, otherwise our rays are too uniform and don’t fill the scene. This is done by passing a noise texture to our GI shader and sampling the current pixel for the noise value. This noise value normalized (values 0.0 to 1.0) and in order to apply it to our ray offsets we simply multiply by TAU (PI * 2): float float theta = noise * TAU;. This is animated noise, which is fundamental to offsetting our rays to avoid the banding problem.
If you don’t pass in a noise texture then this happens, rays cast naively and the low ray-count keeps the scene from filling in properly, this the banding problem:
However, even with noise fixing our banding this leaves use with a MASSIVE problem! Now our scene has noise and noise is terrible to look at and ruins video encoding of your game (trailers, streamers, etc.). The brighter the scene, the more noticeable the noise is as well. There are three ways to fix this:
Increase the number of ray samples, GPU intensive, difficult on user hardware.
Use, I most definitely didn’t write myself, denoiser, which adds color banding.
Be smarter with your noise.
I like option 3. For noise we want uniformity so that all pixels have equal chances of hitting surfaces when raymarching each frame. If our noise is static we get uniformity in space; causing the noise to be visible to the player. To fix this we “shift,” or modify the noise so that it changes over time as well making it less noticeable—especially with temporal filtering, a technique of merging rendered frames over time to fill in noisy data.
The type of noise you choose affects this and some noise is better than others and the best is Blue Noise, which is a type of noise that mimics noise given off by Cherenkov radiation. The reason is when randomly sampling blue noise the random samples are spatially uniform unlike with other types of noise.
In the field of Graphics programming, it is typically recommended to add the Golden Ratio (PHI) to blue noise because the noise becomes more “blue” or more spatially uniform over time. This means that we take our input noise texture and add PHI some N (frame time) and set that as our new noise value: float goldennoise = fract(bluenoise + (PHI * sceneTime));. This is the result:
This is great for 3D applications, but for 2D we can actually do better! With 2D lighting, you can see the entire scene from the camera’s perspective and thus take advantage of frame-to-frame consistency between samples. If the previous frame has some random offset X and the current frame has some random offset Y some of our rays may overlap previous samples, resulting in messy sampling and missed samples between frames perceived by the player. To fix this, we can take blue noise and add a time offset converted to radians and “rotate,” the blue noise adding frame-consistent offsets while maintaining spatial uniformity:
#define PI2 float(6.2831853071795864769252867665590)
vec4 sample = texture2D(gm_BaseTexture, fragCoord);
float bluenoise = mod((sample.r * PI2) + (sceneTime * (1.0/PI2)), PI2);
gl_FragColor = vec4(vec3(bluenoise / PI2), 1.0);
This samples our blue noise, converts our game’s scene time and blue noise to radians and adds them together. Finally, write the normalized blue noise back to the image. Now look at how clean that is by comparison for so little extra effort…
Conclusion
While Global Illumination is possible in real-time it still comes with a hefty performance cost and should be used stylistically with your game as needed. Even if you don’t need GI, hopefully now you have a solid understanding of the core concepts such as JFAs and Image-Based Distance Fields behind it that have many other practical applications:
Pseudo-wave propagation (e.g. sound/wifi).
Falling sand simulator games (such as Noita) where you’re constantly raymarching per-pixel to decide how and where to move simulated pixels. Added GI bonus.
Accelerated Scene Traversal using JFAs/SDFs. You could for example convert the image back into a buffer to read on the CPU to accelerate other scene traversal functions for AI or laser rendering (create a normal map using the JFA so you can accurately bounce lasers off of surfaces using the surface normal).
Planet Gravity. You can create a normal map from the JFA by taking the direction from each pixel to each encoded position. This normal map can then be used to get the direction of travel to the nearest surface for simulating planet gravity.
Extras
I’ve created a special GitHub project with everything covered in this tutorial. Also you’ll notice the SDF and JFA surfaces look wonky, this is on purpose, I’ve added 2-byte encoding for higher precision raymarch jumps. As always everybody starts somewhere, and I started my journey with GI using the GODOT tutorial below which deserves half the credit here!
GitHub Source Code: GI
Introduction to Signed Distance Fields
GODOT Source Tutorial


