Mini: Interpolation
An introduction to texture filtering: nearest, linear and cubic
Hi folks,
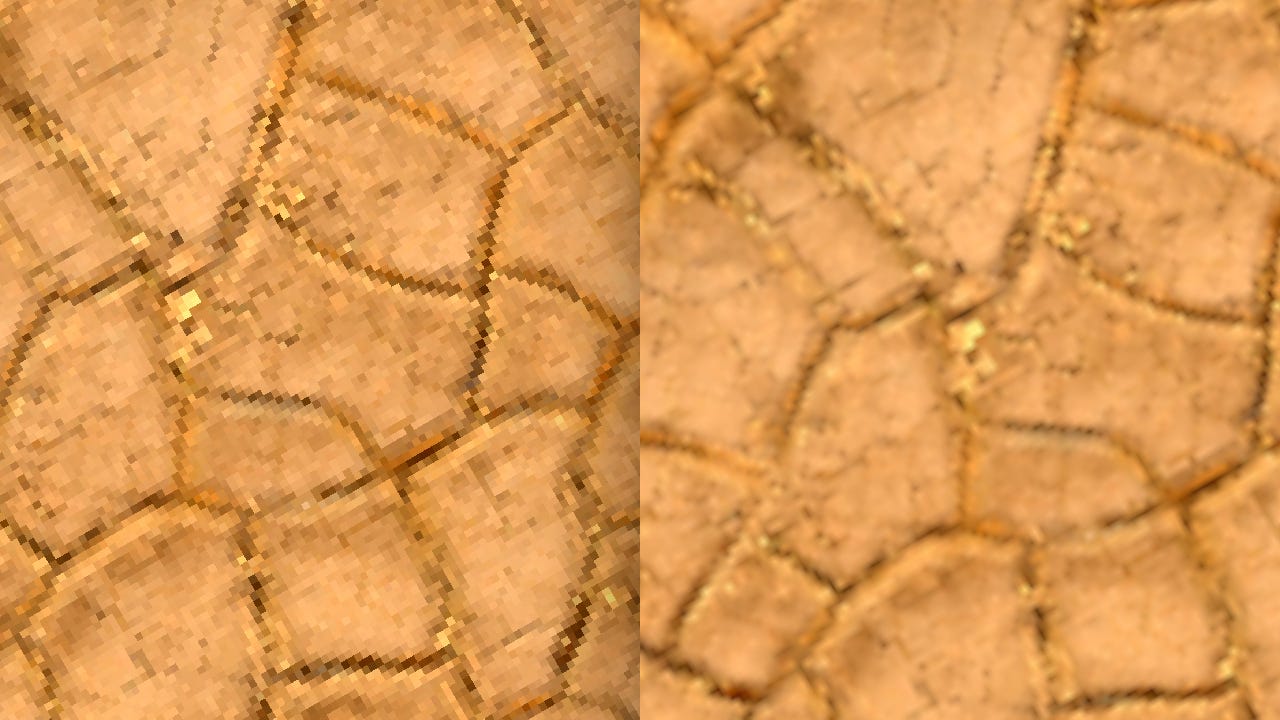
Today's topic is "texture interpolation," which determines how textures look when scaled. The two most common forms of texture filtering are nearest and linear.
Let's take a closer look:
Linear Filtering
Linear texture filtering can be enabled in GameMaker using gpu_set_texfilter(true)
Or only to specific samplers:
gpu_set_texfilter_ext(uSampler, true)
The general rule is that if your game is pixel art, you'll want filtering off, but otherwise, you should turn it on.
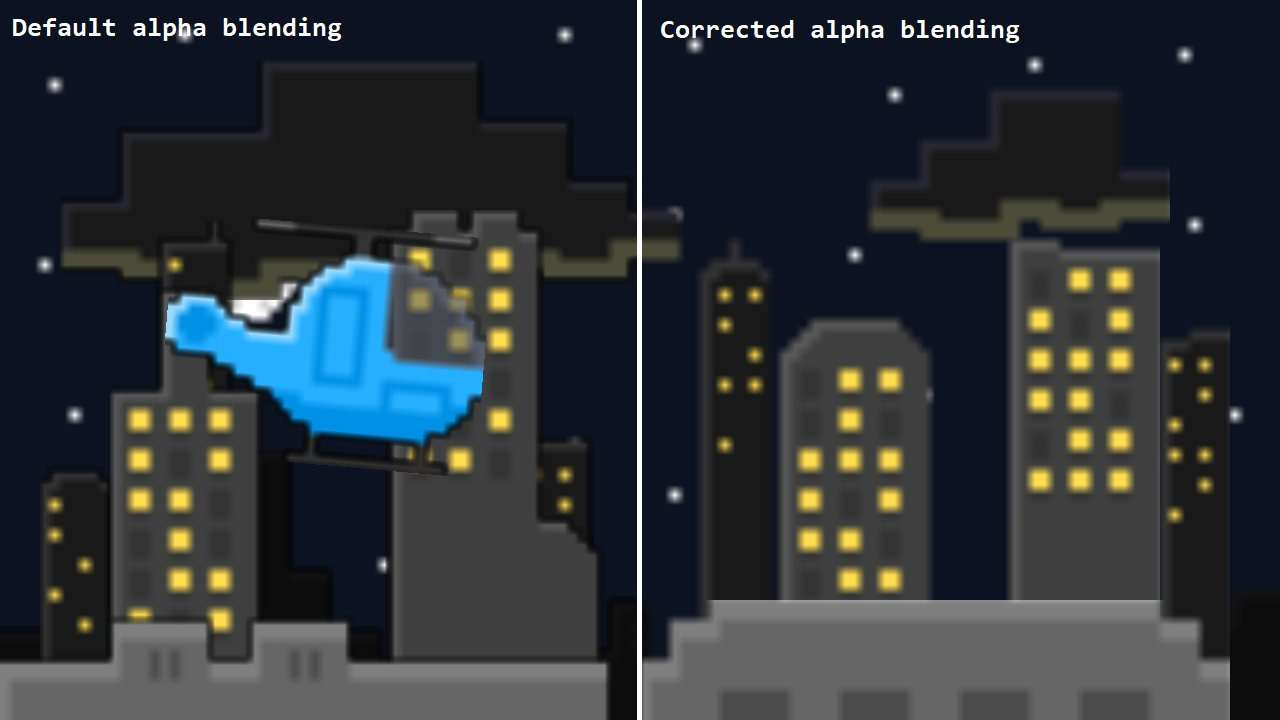
Note: With linear filtering, you may see strange outlines around your sprites:
Notice the black edges around buildings disappear on the right side. This is due to how GM blends color. Basically, GM by default blends the color and alpha in the same way. So if you're blending a red pixel with 50% alpha onto a blue background, you get 50% of the red color and 50% of the blue. If the alpha is 80%, then you get 80% red and 20% blue.
That makes sense, right?
Here's the strange bit: Even if the background color is completely opaque (meaning 100% alpha) blended result may have an alpha of less than 100%, which is where the black color leaks in. This is because the alpha is blended along with the color, so 100% alpha mixed with 50% alpha = 75% alpha.
In shader terms: vec4 blendRGBA = mix(srcRGBA, destRGBA, srcRGBA.a);
The solution I used above was this blend mode:
gpu_set_blendmode_ext_sepalpha(bm_one,bm_inv_src_alpha,bm_one,bm_one);
Blend modes are another big topic, so I'm afraid I won't be able to cover how they work here. I encourage you to play around with it, though, to see if you can understand how it works.
Mark Alexander wrote about this in greater detail if you'd like to read more about it.
Nearest Filtering
Nearest filtering just uses the color of the nearest pixel without blending (AKA "interpolating") between pixels at all. It's easier to see if you look really closely:
It's helpful to understand the relationship between them before going to other filtering types. You can recreate nearest filtering on linear textures like so:
First, we need to convert texel coordinates to pixels and round down:
vec2 pixel = floor(coord / texel);
Then we can convert the rounded coordinates back to texel coordinates:
vec2 nearest_coord = (pixel + 0.5) * texel;
Notice that I added 0.5. This is important because a 0.5 offset ensures we're sampling the center of the pixel. Otherwise, we'd be sampling a blend of 4 pixels every time. Using shaders, we can create our own filters beyond these two options.
Cubic Filtering
Cubic filtering is a bit more subtle, but it can help smooth edges between pixels and generally looks better. Here's a comparison
If you look closely, on the left, you get these diamond shapes around pixels. On the right, you get much rounder and softer transitions. So, how does this work?
Calculate the pixel coordinates like before, except with a half-pixel offset:
vec2 pixel = floor(coord / texel - 0.5);
This time, we need to keep track of the subpixel coordinates also:
vec2 subpixel = fract(coord / texel - 0.5);
And finally, we apply the cubic equation here:
subpixel *= subpixel*(3.0 - 2.0*subpixel);
I have this formula memorized as 3*x*x - 2*x*x*x because it can be used all over the place. This is how smoothstep is calculated and how some noise algorithms generate smooth noise.
Now to convert it back to texel coordinates:
vec2 cubic_coord = (pixel + subpixel + 0.5) * texel;
And you're good to go!
Another common one is "Quintic": x*x*x*(x*(6*x - 15) + 10)
That one is a bit harder to memorize, but it's also nice to know.
There are many other filters out there, so hopefully, this can get you started understanding how they work and how to implement them.
Mipmapping
Before I go, there's one more type of filtering I want to talk about. Mipmapping:
This type of filtering actually interpolates between different resolutions of the same texture, which can be useful for some blur/bloom shaders, or it can help keep textures smooth regardless of scale!
In GM, this can be enabled using:
gpu_set_tex_mip_enable(true)
Or with specific samplers:
gpu_set_tex_mip_enable_ext(uSampler, true)
Once enabled, you can add to the LOD using texture2D's optional argument:
texture2D(gm_BaseTexture, coord, coord.x*7.0);
This makes the blurriness increase with the texture x-coordinate.
Mipmapping has some limitations in GM. It doesn't work on surfaces (yet) and doesn't work well with fonts, unfortunately. It's still something you should be aware of, as it may become more useful in the future.
Read more about it here.
Conclusion
Today, we dug a little deeper into how texture filtering works and how to create your own filtering using linear filtering. We also covered how to fix alpha blending issues and how to manage mipmapping.
I consider that a good lesson for today. If you're feeling generous today, consider buying me a coffee to support my work (I also share some source code there).
Thanks for reading! Have a great night


